Our kitchen is finally coming together. I've shared with you in a previous post about the
AGA appliances we ordered. Well, it seems as though every appliance and gadget we've ordered has taken twice as long to ship out as predicted. And as of yesterday, our range had arrived after having ordered it back in October. But the fridge and dishwasher did not arrive on the same shipment and they are just now telling us that it's on back order and don't know when it will arrive. Ugh. It's hard to contain the anticipation. Our floors are still unfinished, and chalky, and dirty, and the house is still a mess. Mostly, I'm in anticipation mode for the appliances and this kitchen. I've not ever had a 'nicer than average' appliance in my whole life. For the last two decades, I've been cooking on Lowe's brand stoves and the dishwashing is what I've always done manually...or had my kids do. So, it really will be like Christmas ten-fold when that truck unloads!
We wanted to do right by the kitchen on this house and every house we do for that matter. We knew we needed to invest more than average $$ into the appliances. And, boy, does it add up quick!
 |
| via VOGUE on pinterest |
Here's an image of one of my dream kitchens that I refer to over and over and over. {I wouldn't mind looking like the pretty girl. Not sure who she is? Anybody know??} But, anyway, like I said, I don't know if I could ever get tired of looking at this kitchen, could you? Classic white, inset doors/drawers, marble counters, brass hardware, nicely finished and detailed kick-legs, glass-uppers, hardwood floors.
Even though Will and I had the jist of what we knew we wanted the overall look and feel of the kitchen to be, there were still many, many details that we knew we had to oversee and be 100% accurate with. I've poured over many, many kitchens on pinterest and magazines for months and months now to make sure I haven't left a detail unnoticed.
One of the things that I'm loving is antique brass for pulls and fixtures. I sourced a faucet online that I fell in love with; a bridged, antique brass, farm style faucet. British Made, and only $895! Well, that's a little much out of our price range, so I did some more searching and found a faucet I absolutely fell in love with that was less than half that price. It's a two handled,
Phylrich International faucet, in satin brass, with darling cross pulls that depict the perfect amount of antique that I'm aiming for, all while being a one hole faucet {which is a nice modern feature}. One holed faucets are less maintenance in my mind. Less grime and muck to clean. It also gives a cleaner look.


Here's a birds eye view of the kitchen layout. Pardon my chicken scratches, and x's. We have made some minor adjustments to this. It's virtually the same as the original layout, but with a few configuration manipulations and additions. As you see, the appliance layout almost hits a 'perfect triangle recommendation' up above {Sink at top, fridge on right, and range on left}. The initial layout of the kitchen didn't work that way. It had the stove and fridge just floating on their own on the left wall. No cabinetry with them at all. NOT pretty. I should note that the nook and pantry aren't pictured here on this layout. Picture if you can, the Breakfast off the lower right hand side, and a butler's pantry off the upper right hand side.
The butler's pantry is a about a 12 foot long, narrow breezeway that attaches our house/kitchen to the garage. Originally, the butler's pantry had a wall of floor to ceiling cupboards in hunter green:-) Then three exits at the end. As pictured here below. Not too bad.
We tore those cupboards out to make way for upper and lower cabintery, and to add more countertop workspace for kitchen usage. My 18 year old daughter is a really accomplished pastry maker and she is more than excited to have all this marble countertop workspace. {Okay, I hope my explanation and pictures make sense. Sometimes I backtrack when explaining here, but hopefully you can tie some of my nonsense all together:) The doorways and wall above show the exit to pantry {on left} and nook {on right]. We tore a portion of that small in-between wall out too. So it would look like this:}
Now, do you see where I'm going with this? We decided to build a fridge cubby there instead, as pictured below.
That way the fridge won't be crammed over on the other wall with the range. With the fridge in it's cubby, we'll now have the 'near perfect' triangle, and the flow of the kitchen will be {I really hope, and fingers double crossed} REALLY nice. The left door pictured here is going to be arched just as the nook is, which was at Will's insistence.
The pantry will be housing all the extras little things like the food in upper glass paned cabinets. Microwave, kitchen aid, toaster, blenders, etc all in the lower drawers. As well as an under counter fridge for storing Will's specialty beers that he loves.
Figuring out where the fridge would go was Will's idea. And I think it's the best idea. He's so cute sometimes! I really, really didn't want it smashed together next to the range. I really wanted one wall devoted to the range itself. I LOVE kitchens that have the range as the center focal point with a clear line of symmetry on either side of the range.
So, all in all the bright side of our home progress is what I have to keep reminding myself of. I know I complain about how slow everything is, but it really has been clipping together pretty nicely, and will and I have had so much fun doing this as a team, along with a fantastic crew!
The breakfast nook will have a pair of upholstered and tacked banquettes, a long table, and a tv mounted to the corner wall of the room, so it won't be visible from anywhere in the kitchen, except if you actually sit down at the table.
For the sink wall, we left the sink wall configuration virtually the same, only we are making the counter depth deeper than the original. I'm excited to put some potted plants directly behind the faucet. We tore all of the existing cabinetry and old tile out. I admit, it pained me a bit, because I have admiration for the old cabinetry and it's lines. I loved the old subway tile too. But we found an identical match to the tile and our carpenter is beyond wonderful.
We will have an under counter trash can pull to the right of the sink, as well as a cutting board pull out. {I took some advice from Will's mom on what features were most important to her as she is just a really really good cook who likes a well functioning method of placement for things in her kitchen. I hope to be a real cook someday. ha. We'll see. {Btw, I'm already trying to warm up to cooking by making myself try one new pinterest recipe a week. My daughter is rating how well she likes them on instagram. Please feel free to follow along and hashtag your own recipes on Wednesday with me. I'd love to know what recipes you are cooking up!}
Okay, so my mother in law uses the heck out of her cutting board pull outs. I think it's a great idea. Not only for chopping, but for buffet style service when dinner is plated in the kitchen and more counter space is needed.} So, all in all, we will have 3 pull out cutting boards. Two of them will flank the stove.
Another thing she advised us on was to use drawers. We decided to go ahead and give all the lower cabinets drawers only. Except for under the apron front sink. Drawers are just so much easier for accessing things. Especially since our drawer glides will be full extensions for reaching to the very back, to those normally unaccessible areas.

Here's a view of the butler's pantry looking into the kitchen area. {The back side of fridge cubby}.
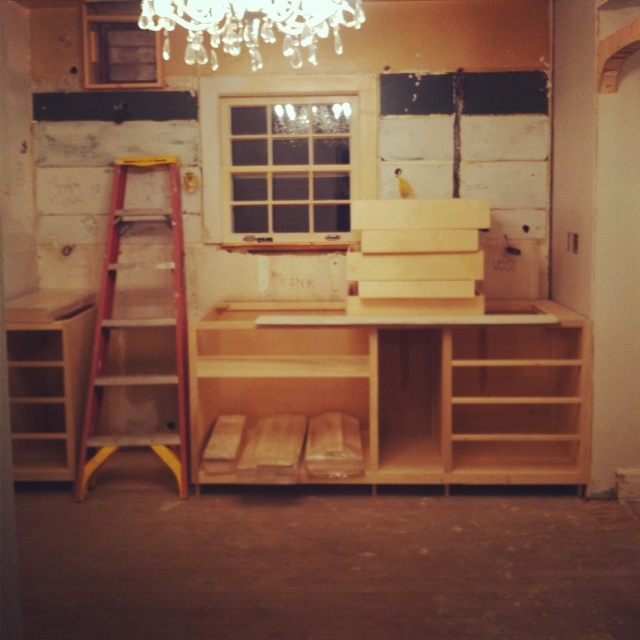
Some of the base cabinetry has arrived! {Sink and dishwasher wall.}
And, we now have our
Kohler apron front farmhouse sink installed! It's a 36" porcelain over cast iron. And it is so beautiful! Boy, am I feeling really lucky and excited.
Thanks so much for reading this REALLY long post. Hope I haven't bored you and hopefully you might visit here again soon. Please follow me on instagram and join me with cooking ideas, and share your recipes too. I love hearing from you. I will post my favorites here in a bit! :)
xx
sharon